
Contents
Design is a constantly evolving field. Staying ahead by learning from time to time can help you advance in your career, innovate, create groundbreaking solutions, and stay relevant. However, this can come with many challenges, such as keeping up with changing technologies, collaborating within teams, and meeting quality standards or all of them at the same time.
 Fortunately, with the right resources and tools, elevating your design skills is achievable regardless of whether you are a beginner or an experienced designer looking to level up your work. Successful product design requires a combination of creativity, technical expertise, and access to the right resources.
This guide offers valuable resources, essential tools, practical tips, and insights to help you navigate the complex stages of product design and bring your vision to life expeditiously.
So, let’s dive into the details and uncover the resources that will help you take your design skills to the next level!
1. Version history in Figma

Keeping track of different versions of a design is super important! Think of it like making updates to your favorite video game — you want to make sure the newest version is the best it can be.
With versioning in screen design, you can easily see how your design has changed and evolved over time. You can manually save and name new versions to capture a snapshot of a specific stage of the design. You can also add details about the changes. If you ever need to go back to an earlier version, it’s as simple as turning back the pages. Plus, you can compare different designs to see what works best. And if you’re working with a team, versioning works like a charm to ensure everyone is on the same page.
No more “Whoops, I didn’t mean to delete that part!” or “Wait, which version were we supposed to use?”With versioning, you’ll always know what’s what, which also helps in clear communication while handoffs. Read more about how versioning can help with handoffs here.
“This is a great feature for someone who also works in a team with other designers. It was super helpful for me in a situation where my co-worker deleted something I was working on. It saved my life FOR REAL!” — says one of our designers, Paola.
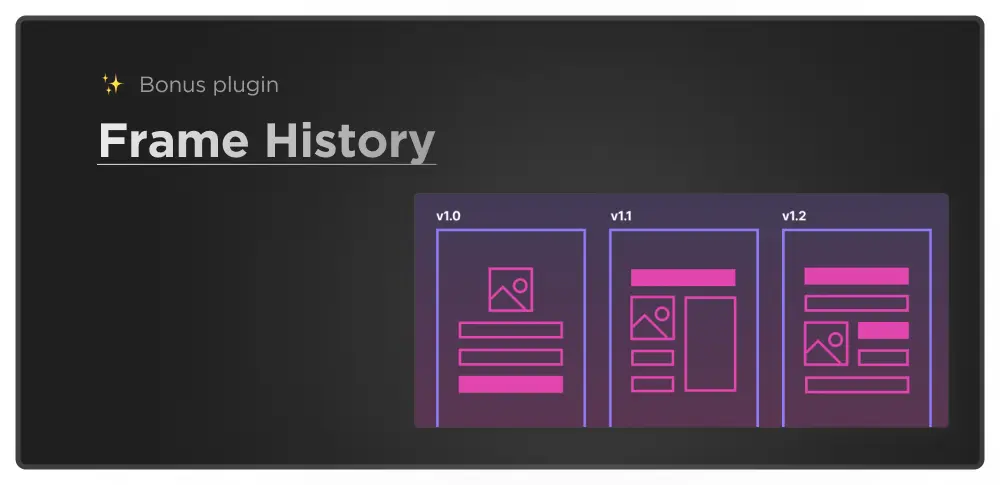
Bonus: An alternative solution to this is the Frame History plugin available in Figma. This plugin allows you to save frames with a single click in a visual timeline to let you navigate faster.
2. Khroma – AI-powered color tool
With so many colors and color combinations available, it can be overwhelming to know where to start, make choices and implement on the ongoing projects. This can take a lot of time for anyone resulting in neglecting the other equally important aspects of the project.
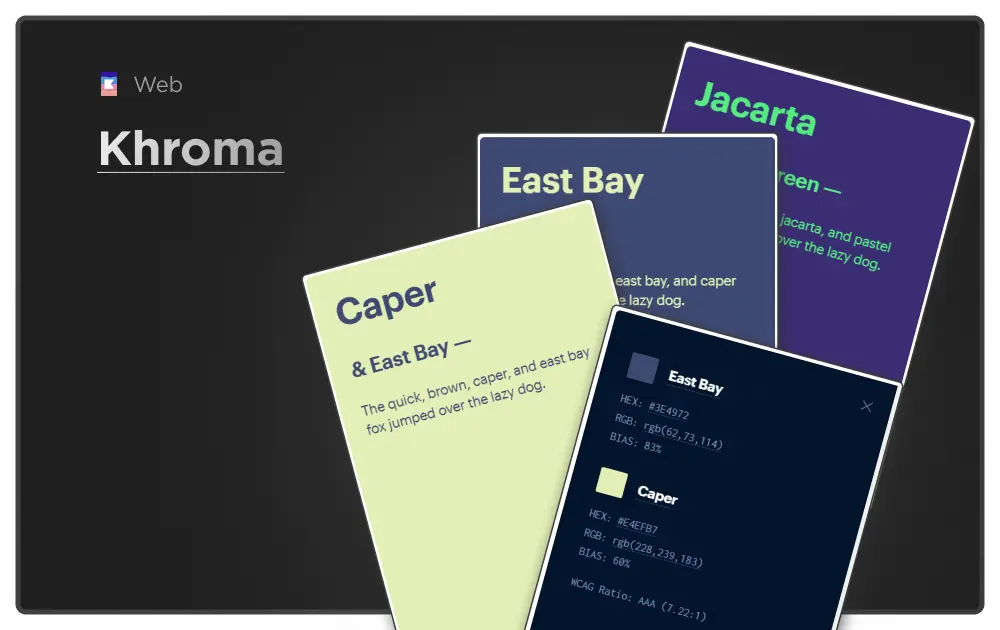
That’s where Khroma comes in. It uses AI to learn which colors you like by letting you choose a set of colors as a starting point and creates boundless palettes for you to discover, search, and save.
This makes it a convenient solution for professionals in the design and marketing fields to create cohesive color schemes for their projects.
It also provides a lot of additional features:
- Showing WCAG(Web Content Accessibility Guidelines) ratio on each pairing for super easy choice-making while keeping accessibility guidelines in mind.
- Generate poster colors, gradients, palettes, and images(dual tone) are also available.
- It allows you to search and filter by hue, tint, value, and color, as well as hex and RGB values.
3. Downsize – Image compression plugin
Have you ever encountered slow performance when working with big files on Figma? As you continue working on your project, you may notice that loading times are increasing, and problems that weren’t present in the initial stages begin to arise. It can be a real bummer, right?
As the file gets bigger, it can become more challenging for your computer to handle, leading to performance issues. At this point, you may conclude that there is a problem with your machine.
What if you found out it has nothing to do with your machine but the number of assets that got increased in your file recently, which resulted in this?
High-resolution images can take up a lot of memory, causing Figma to lag and slow down. To avoid this, keeping your image file sizes to a minimum is a good idea.
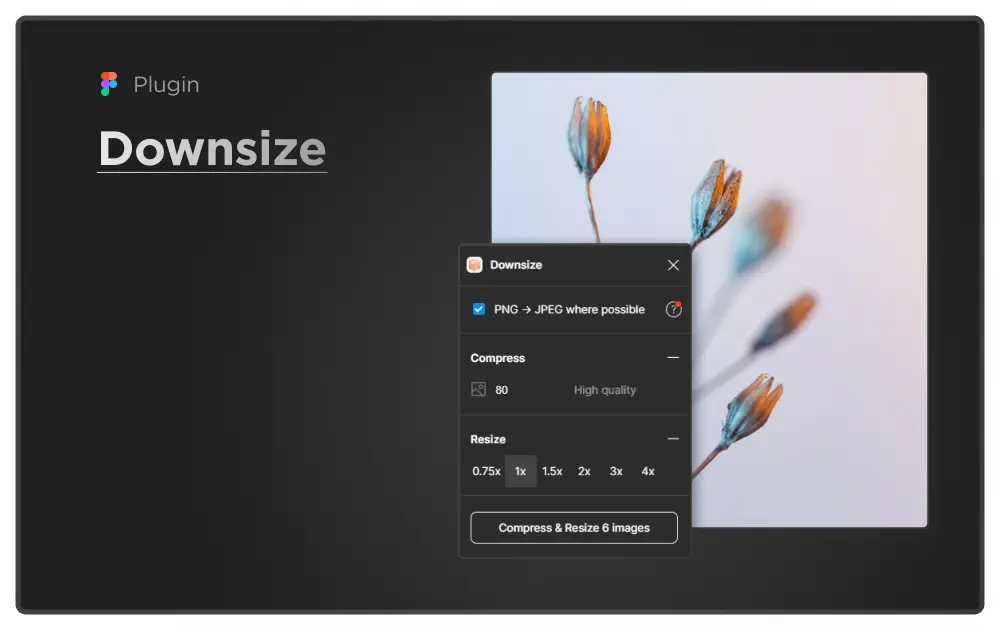
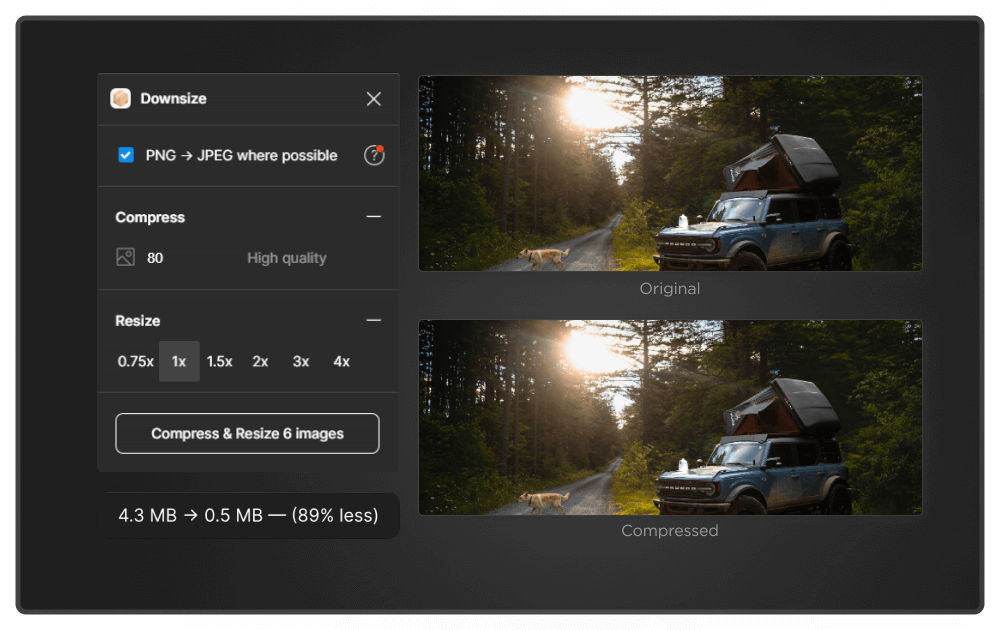
To address this issue, Downsize was created. This resource was found after our designer, Katica, shared in our #designers Slack channel her problem of images being super big and files loading too slowly. Downsize makes it super easy to compress and resize images without even leaving Figma or FigJam!
Here are some quick steps on how you can use it:
- Open the plugin using Shift + I or from the top bar.
- Once the plugin modal is visible, choose an image to compress.
- Downsize provides quality compression and resizing of the image.
- Choose the quality percentage to compress.
- Add resizing from quick options 0.75x, 1x, 1.5x, 2x, etc., if needed.
- Press the button to compress & resize.
- The new image sizes will be overridden on the same image with compression. That is it!
4. Button – Widget for easy navigation

Keeping Figma files organized and consistent can be a challenge for designers. This can make it difficult for team members and stakeholders to understand and navigate the design. This can be especially problematic when it comes to handoff documentation and creating systematic big-scale Figma files.
Fortunately, Figma has a widget called “Button” that can help streamline the design process and make it easier to maintain consistency across project handoffs.
With just a few clicks, designers can easily add pre-designed buttons to the file pages. This can be helpful in creating consistent handoff documentation and systematic Figma files.
By using the Button widget, designers can simplify their workflow and make their Figma files more user-friendly for everyone who accesses them. This can include designers, marketers, copywriters, and even stakeholders who may not have experience with design tools. Overall, the Button widget is a powerful tool for designers that can save time and improve collaboration, making it a must-have for anyone working with Figma.
Either add a URL or navigate to a selection of frames. This does it all so quickly. It not only saves you time and effort, but it also offers customization options to make the button fit your specific needs. This makes it a handy and must-have widget for huge Figma files.
Here are some quick steps on how to use it:
- Open the widget using Shift+I or from the top bar.
- Tap on the run button to run the widget.
- A button will appear with a settings option on it.
- Use settings to choose the color, size, and settings of the shown button.
- Tap on “Settings” to view additional options, such as adding a button label, URL, or how and where the navigation should happen.
- Voila, add the button where ever you want!
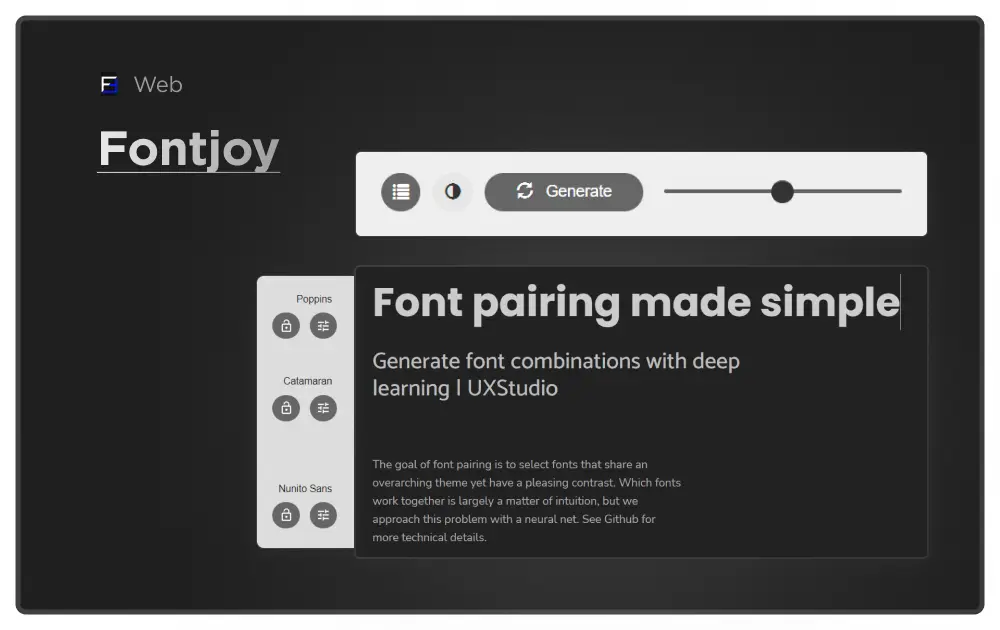
5. Fontjoy – Simplify font pairing
Font pairing is a classic problem in the design world. Fonts are used differently for brands to make a statement, guide the eye, and create a strong brand image. They can greatly affect how a brand looks and feels, making its messages more memorable and meaningful. They can also help set a brand apart and make it stand out from others. Cool, right? But why is it an issue to choose them?
The sheer number of fonts available makes it difficult to know where to start and which fonts will work well together. Compatibility is also a major consideration, as not all fonts will complement each other in style, size, and spacing. Brands often have specific font requirements that must be considered, and personal preference also plays a role. Different designers and brands may have different opinions on what makes a good font pair.
To successfully find the right font pair, we must have a good eye for design and be able to critically evaluate based on how it would impact the overall space, also keeping the basic typography principles in mind.
This is where Fontjoy offers a new approach to font selection by using machine learning to generate font pairings.
This makes the process of finding the right fonts much easier and less time-consuming. Designers and branding professionals can find endless choices for their projects with features such as:
- Selecting contrasting or similar fonts based on the desired similarities between areas such as title and body text.
- Choose to lock a font type for a selected area, then search for a matching pair you want on the other one!
- Modes, view your pairings in both light and dark modes to get the best understanding for choosing them.
6. Devices by Meta – Mockups for any device
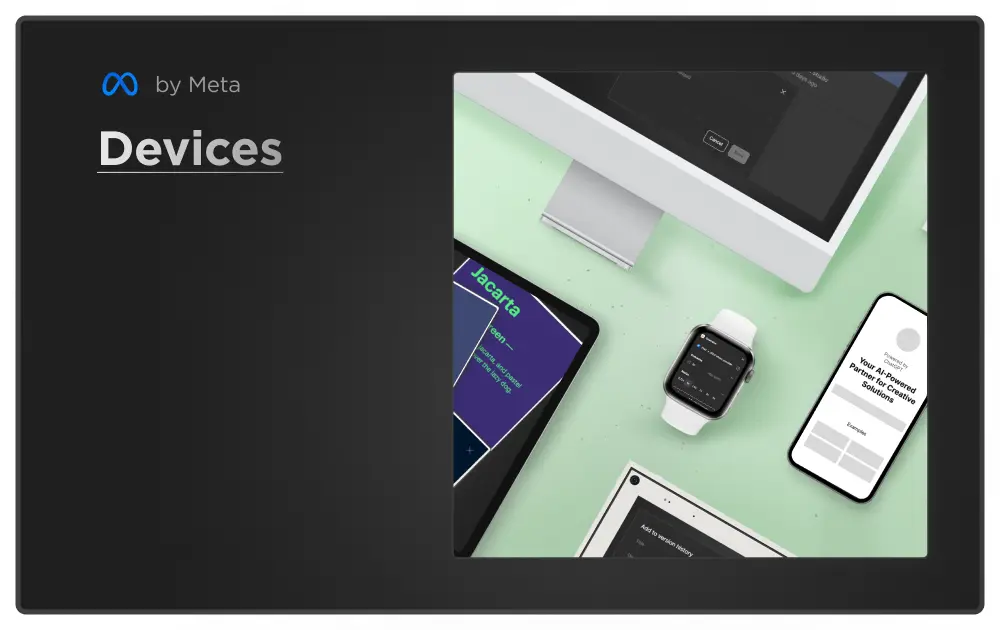
Mockups can help designers address several challenges they face in the product design process, including difficulty visualizing the final product, lack of feedback, difficulty testing functionality and usability, and time and resource constraints. By using mockups, designers can create successful products that meet the needs of their target audience and achieve their goals with better visualizations.
The Devices by Meta, offered by Facebook Design, provides a valuable resource for designers and developers. It features an extensive collection of virtual devices, including smartphones and desktops, that can be used to preview designs in a realistic and interactive manner. The site is regularly updated to include the latest devices and operating systems.
The virtual devices come in various sizes and resolutions, allowing designers to test their work on different screen dimensions and aspect ratios. With Devices by Meta, designers can ensure that their designs are optimized for all types of devices, providing a consistent user experience for their audience. This is an essential resource for enhancing the design presentation processes to get real previews on desired devices.
7. ChatGPT – Replace Lorem ipsum

Now that ChatGPT is here, can we please let Lorem ipsum die?
Well-crafted copy helps to communicate important information to the user, provide guidance, and establish a brand personality. It can make or break the user experience, as it can be the difference between a user finding the product confusing or understanding its purpose and benefits.
Designers often need help with mental blocks when working under tight deadlines, which can make it difficult to come up with solutions as they normally would. This can happen at various stages of the design process, including when trying to replace the placeholder text “Lorem ipsum” with actual content for a design project. Designers may struggle to find the right words and phrases to communicate the intended message. This can lead to frustration, delays, and subpar results.
ChatGPT can help designers replace the placeholder text with real, meaningful, and engaging text, enhancing the quality and impact of designs in various contexts. It can generate text based on inputs the user provides, such as product descriptions, website copy, or product specifications. It can also assist with copywriting for product packaging and marketing materials, providing well-written, polished text to replace Lorem ipsum.
While creating a design, designers can just focus on the design part and get the description with the help of ChatGPT.
Let’s take a very simple food product card as an example. We asked Chat GPT to write a product title and product description for roasted almonds for an e-commerce platform. See the results below.
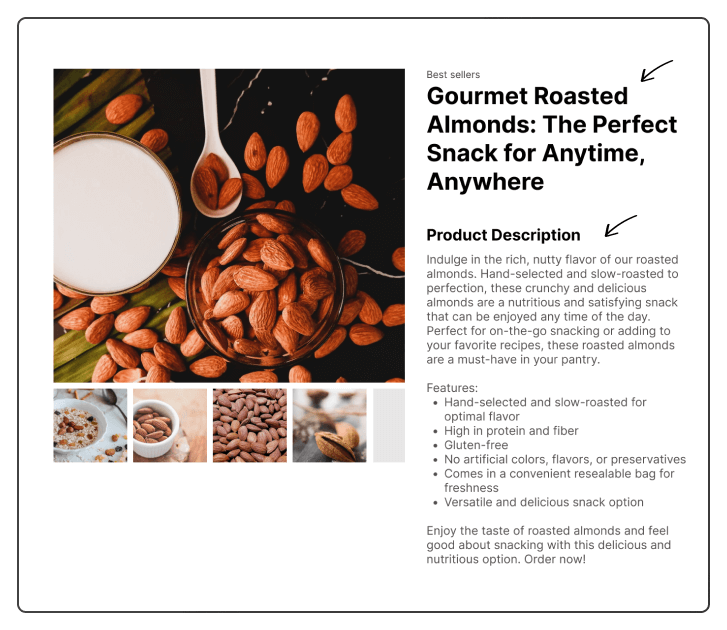
But don’t forget! Without a proper understanding of the user’s question and context, it can be challenging for ChatGPT to provide helpful and informative answers. More detail, relevant background information, or context can help ChatGPT provide a more tailored and personalized response, ensuring the best possible outcome.
Final thoughts
Integrating technology and design expertise not only enhances the quality of the final product but also impacts the professional’s own productivity. By leveraging technology, designers can streamline their workflow, automate repetitive tasks, and collaborate more effectively with clients and team members.
This enables designers to use their time more efficiently, allowing them to tackle more problems and meet tighter deadlines. Ultimately, this can lead to greater success and career satisfaction.
With the constantly evolving advancements in technology, it is essential for designers to have a strong understanding of how to use it in the design process. This will maximize their productivity and help them achieve their goals.
In conclusion, using the right tools can significantly enhance a designer’s workflow from start to finish. By taking advantage of these tools, designers can save time, streamline their processes, and produce high-quality work more efficiently.
Want to learn more?
If you want to learn more about UX design and our experiences working on projects, make sure to check out our UX design blog.
We share valuable insights, tips, and best practices to help you grow your skills and knowledge in the industry.
Also interested in Product Design processes? Check out our free e-book, the Product Manager’s Guide to UX Design.

