
New Relic is a popular infrastructure observability platform used by hundreds of organizations worldwide. It allows engineers to have access to an enormous amount of data about their application performance.
Combined with Split’s IFID capabilities for measurement we can build a winning team for monitoring feature by feature performance at the level of individual feature flags. This allows seamless integration with existing instrumentation of your applications.
In this example, we are going to be showing how to leverage a web app that uses the New Relic Browser Agent and can send the events it captures to Split.
Sample Web App
We are going to use a very basic web application that uses New Relic’s web RUM agent as our example. This app will send traces to New Relic.
The first thing you will need to do is download the sample code from Github and install the required Flask library. It is best practice to do this in a Python virtual environment.
gh repo clone Split-Community/New-Relic-RUM-Demo
cd nr-sampleapp
pip install flask
Next, we will go ahead and create an application in New Relic to represent our sample app.
Inside New Relic
Go To Add Data > Browser > Browser Monitoring
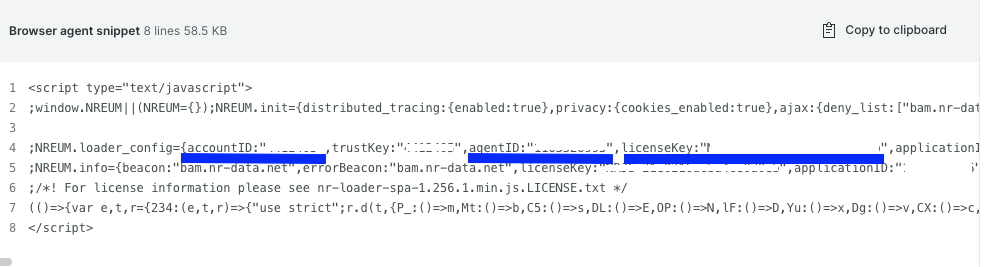
Click the option about the Javascript snippet.

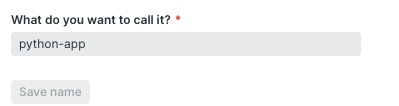
Give your app a name.
Click Continue, then Continue again until you get to the Install Browser Agent step.
The code you’ve downloaded already has the browser agent installed, however, we do need the account id, license key, and agent id from the snippet that New Relic has generated.
Create the Config File
Next, you will need to create a config.ini file in the nr-sampleapp folder that contains your config for the app. Use the contents below to start with.
[DEFAULT]
NR_ACCOUNT_ID = <Account ID>
NR_LICENSE_KEY = <License Key>
NR_AGENT_ID = <Agent ID>
Put the account id, agent id, and license key from the snippet into this file.
Reviewing the Code
This application is a very simple web server that prints the string Hello World to the browser.
One thing to note that makes the connection to Split work is something we can see if we look at line 12 of the index.html file in the templates folder.
newrelic.setCustomAttribute("userId","{{ userId }}");We are adding a custom attribute here to the New Relic traces. This is critical in order for us to link up with the Split Impressions. Split needs to know the ID of the user (or the anonymous id) in order to join across from the impressions created by the Split SDK to the trace events created by New Relic.
Testing the App
Now that we’ve got our config file set up, let’s run the sample app to confirm that we get data.
In the nr-sampleapp folder run python3 servepage.py
You can now navigate to the application at 127.0.0.1:5000 in your browser and see Hello world if everything works.
It will automatically refresh the page to keep creating traces.
Reviewing Traces
To look at the data, you can then go use the NRQL query language to retrieve and review them.
First go to the Query your data area in New Relic.
The query you can use looks like this:
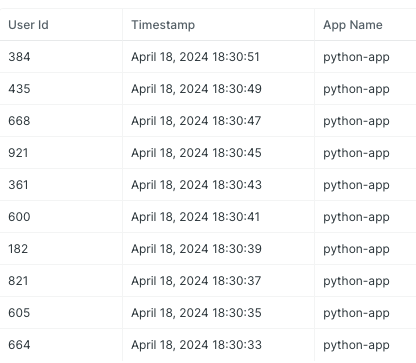
SELECT userId, timestamp, appName FROM BrowserInteraction WHERE appName = 'python-app' SINCE 4 hour ago
If everything was successful, you should see some records that came across.
Now that our app is up and running, sending data to New Relic, we can look at sending these events to Split!
Pushing Data to Split
First, go ahead and navigate to the nr-eventpush folder and install the requests library.
cd ../nr-eventpush
pip install requests
Next, you’ll need to create a config.ini file inside of the folder.
[DEFAULT]
NR_ACCOUNT_ID = <Account ID>
NR_APP_NAME = python-app
NR_API_KEY = <NR Api Key>
SPLIT_API_KEY = <Split SDK Key>
You can get your Split SDK key from the Administrator Panel in Split. You will use an SDK key (not an Admin API key) and can use either server side or client side.
The NR_API_KEY you can get from the API key section in the New Relic settings.
You want to use a User key, which will allow you to gain access to the Nerdgraph API.
If you don’t have one already, you can create one with the Create button and the modal window will appear.

This is the key you will put in the config.ini file mentioned in the nr-eventpush folder as the NR_API_KEY.
Now that you’ve got the config file set up, the next step is to review the code to see how the data transformation is occurring.
Review lines 43 to 91 of eventpush.py
def create_split_event(event_type_id, value):
    split_event = {
        "eventTypeId": event_type_id,
        "trafficTypeName": "user",
        "key": result['userId'],
        "timestamp": result['timestamp'],
        "value": value,
        "properties": {
            "sessionTraceId": result['sessionTraceId'],
            "browserInteractionId": result['browserInteractionId'],
            "previousUrl": result['previousUrl'],
            "countryCode": result['countryCode'],
            "entityGuid": result['entityGuid'],
            "asnOrganization": result['asnOrganization'],
            "previousGroupedUrl": result['previousGroupedUrl'],
            "city": result['city'],
            "userAgentName": result['userAgentName'],
            "deviceType": result['deviceType'],
            "session": result['session'],
            "regionCode": result['regionCode'],
            "userAgentVersion": result['userAgentVersion'],
            "asn": result['asn'],
            "targetGroupedUrl": result['targetGroupedUrl'],
            "ajaxCount": result['ajaxCount'],
            "appName": result['appName'],
            "domain": result['domain'],
            "userAgentOS": result['userAgentOS'],
            "asnLatitude": result['asnLatitude'],
            "targetUrl": result['targetUrl'],
            "asnLongitude": result['asnLongitude'],
            "appId ": result['appId'],
            "browserInteractionName": result['browserInteractionName']
        }
    }
    return split_event


# Convert json_response to Split.io format
split_events = []  # Initialize an empty list to store the split events
# Define the event types to be processed
event_types = ["timeToLoadEventEnd", "timeToDomComplete", "timeToResponseStart", "duration", "timeToLoadEventStart", "timeToDomainLookupStart", "timeToDomContentLoadedEventStart", "timeToDomInteractive", "timeToDomainLookupEnd", "timeToConnectEnd", "timeToRequestStart", "timeToResponseEnd", "timeToUnloadEventStart", "timeToFetchStart", "timeToDomContentLoadedEventEnd", "timeToUnloadEventEnd", "timeToConnectStart"]

# Loop through each result in the json_response
for result in json_response['data']['actor']['account']['nrql']['results']:
    # For each event type, create a split event and append it to the split_events list
    for event_type in event_types:
        split_event = create_split_event(event_type, result[event_type])
        split_events.append(split_event)
Each New Relic trace contains a significant amount of data, some numeric, some as properties of those numbers associated with the trace.
For each of the numeric values (listed in the event_types array), we are creating an event. All of the non-numeric values will be attached to the numeric values as a property of the Split event.
To see these events come across, we can open up Split to Split’s live tail.

Make sure you are set to looking at the events Data type.
Click the Query button, and then run python3 eventpush.py and you will see the events come across.
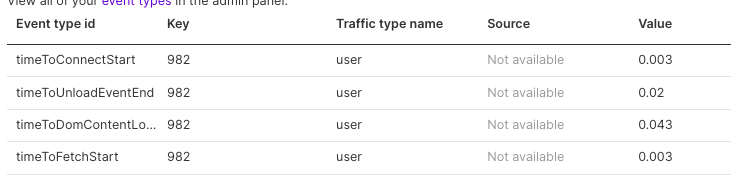
This could be run on a schedule or other regular frequency in order to send events to Split for metric building and analysis.
Wrapping Up
In this short demo you’ve seen how to get events from New Relic, format them, and send them across to Split. This enables you to use Split’s powerful IFID in situations where you are unable to use Split’s native RUM agents or the Split Suite. This shows the flexibility and power of Split’s API event ingestion capabilities, allowing you to capture events and build metrics across systems that don’t even have Split installed.
Switch It On With Split
The Split Feature Data Platform™ gives you the confidence to move fast without breaking things. Set up feature flags and safely deploy to production, controlling who sees which features and when. Connect every flag to contextual data, so you can know if your features are making things better or worse and act without hesitation. Effortlessly conduct feature experiments like A/B tests without slowing down. Whether you’re looking to increase your releases, to decrease your MTTR, or to ignite your dev team without burning them out–Split is both a feature management platform and partnership to revolutionize the way the work gets done. Schedule a demo to learn more.
Get Split Certified
Split Arcade includes product explainer videos, clickable product tutorials, manipulatable code examples, and interactive challenges.